Easy Sourdough Sandwich Bread
This soft and tangy sandwich bread is simple and full of flavor. With ingredients like sourdough starter, honey & flour, its quick to whip up and I promise it will be a family favorite.

Sandwich bread is one of my favorite recipes to whip up. Especially in the summer – when we are so busy and I just need a quick bread for the kids. These loaves are so simple and rich in flavor. They rival my simple focaccia recipe for the easiest to make.
Save this recipe—you’re going to want to keep it on repeat. It’s bound to become a go-to for all your sandwich, toast, and snacking needs. Let’s dive in!
What you’ll need:
- An active, bubbly sourdough starter
- A loaf pan
- Mixing bowls
- A stand mixer (optional)
Sandwich bread vs. Round loaves
A common complaint I hear from people about the traditional crusty sourdough boule (round loaf) is that they miss the softness of a classic sandwich loaf. If that’s you, this sourdough sandwich bread is exactly what you’ve been craving. If that’s not you, check out my Sourdough Boule recipe here, or a Fresh Milled Sourdough Boule recipe here.
Not only is this recipe absolutely delicious, but it’s also incredibly simple. Once it’s cooled, slice into that soft, pillowy loaf and slather it with butter—it’s so good, you might think it came straight from a restaurant breadboard. But let’s be honest, it’s even better because it’s made from scratch and has that perfect sourdough tang.
This recipe is for 1 loaf. I often double or triple the recipe, to make 2-3 loaves at a time. They freeze very nicely! To freeze them, I wait until the loaves cool and slice them up, put the slices in a ziplock bag, and freeze!

Sandwich Bread Ingredients
- 56 g butter (softened) or coconut oil – 4 tablespoons
- 20 g honey or 12 g sugar – 1 tablespoon
- 10 g salt – 2 teaspoons
- 113 g active, bubbly starter – ½ cup
- 295 g water – 1 ¼ cups
- 560 g all-purpose flour – 4 cups
Instructions
1. Combine Ingredients:
I like to start this dough at night, so I can let it rise through the night, then shape it in the morning.
In a stand mixer bowl, combine all ingredients. Start with the water (295g), starter (113g), honey (20g), salt (10g), and butter (56g), and then add the flour (560g) gradually to reach the right consistency. Adding the flour last allows you to adjust as needed based on your starter’s hydration level.
2. Knead the Dough:
Using the stand mixer with a dough hook, knead the dough on medium speed for about 10 minutes, until it’s stretchy, smooth, and pulls away from the sides of the bowl. The dough should be soft but hold its shape. A good test is the “windowpane test”: if you can stretch a small piece of dough so that you can see through it, without it tearing, it’s ready.
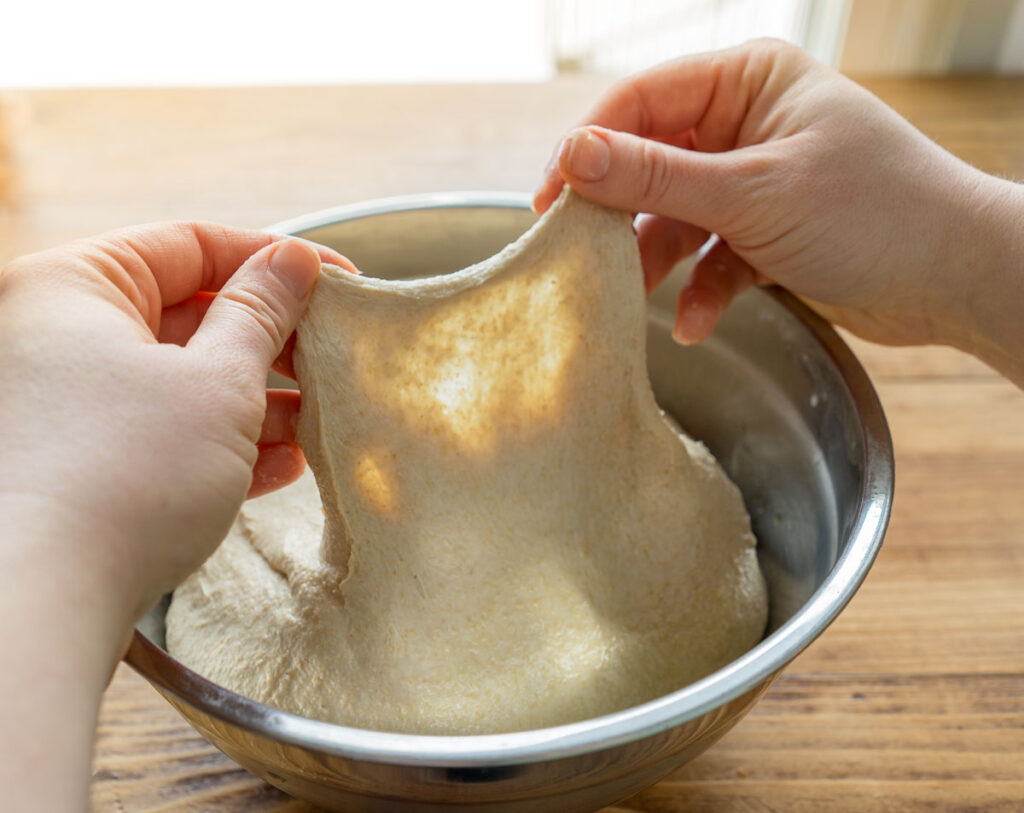
- Note: You can also knead the dough by hand if you don’t have a stand mixer. Knead vigorously for 10–15 minutes until you achieve a smooth, elastic dough.
3. Bulk Fermentation:
Once kneaded, transfer the dough to a large, lightly greased bowl. Cover it and let it rise in a warm spot for 10–12 hours. The dough should double in size during this time.
4. Shape:
After the bulk rise, turn the dough out onto a lightly floured surface, flatten it into a rectangle, then roll it up tightly. This shaping helps create surface tension, leading to a better oven spring (rise) while baking.
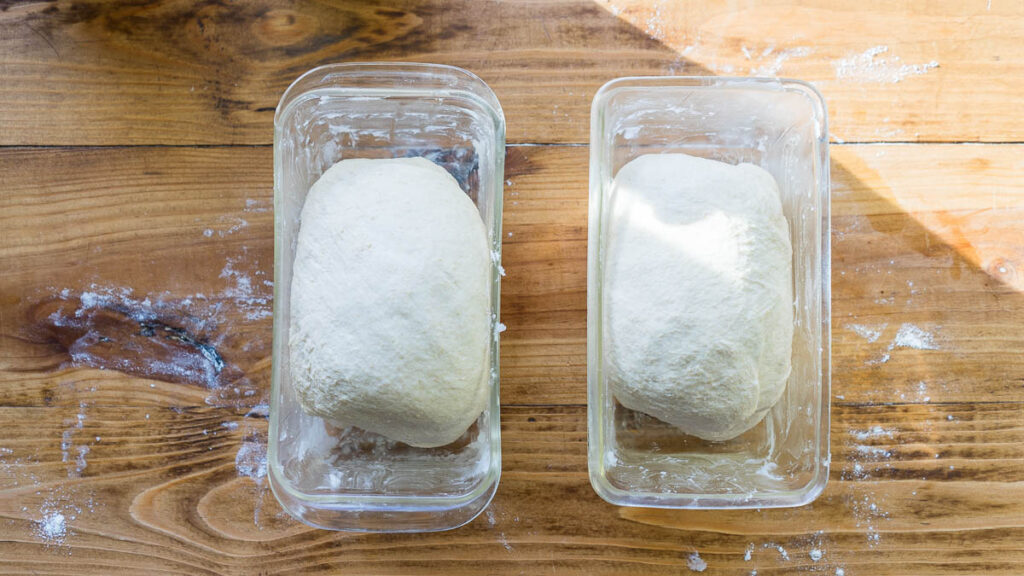
5. Second Rise:
Place the shaped dough into a parchment-lined or buttered loaf pan. Cover and let it rise at room temperature for 2–4 hours, or until doubled in size.

6. Preheat and Bake:
Preheat your oven to 375°F (190°C). If you’d like a shinier crust, brush the tops of your loaves with an egg wash (optional). Bake for 40-45 minutes or until the tops are golden brown and the loaves sound hollow when tapped.
7. Cool and Slice:
Allow the loaves to cool completely before slicing. This cooling step is essential to finish setting the crumb structure inside the bread. Now you’re ready to enjoy fresh homemade sourdough!
Tips for Successful Sourdough Baking:
- Adjusting Flour Amounts: Since sourdough starter hydration levels vary, you may need to adjust the amount of flour slightly. Start with the amount in the recipe, then add a little more if the dough is too sticky.
- Softened Butter: Use very soft butter cut into small cubes, which makes it easier to incorporate into the dough.
- Watch Your Mixer Capacity: Depending on your stand mixer model, handling a double batch might be too much for the motor. If you have a standard KitchenAid, you may want to only make one loaf at a time, I use this mixer and it can handle multiple batches of dough with no issues, she’s a real workhorse.
- Avoid Over-Fermentation: Over-fermenting can turn your dough into a sticky mess that struggles to rise properly. If this happens, don’t worry! You can still repurpose it into sourdough croutons or breadcrumbs.
This recipe is a fantastic foundation for your sourdough baking journey. With a bit of practice, you’ll quickly become comfortable with the steps, and soon enough, you’ll be ready to try adding variations like seeds, herbs, or even whole grains. Enjoy the satisfying process of creating your own sourdough bread right at home, and savor each delicious bite!

Easy Sourdough Sandwich Bread
Equipment
- 1 Kitchen Scale
- 1 Stand mixer or mixing bowl
- 1 Loaf pan
Ingredients
- 56 g butter softened, or coconut oil 4 tbsp
- 20 g honey or sugar (20g for honey or 12g for sugar) 1 tbp
- 2 teaspoons salt 10g
- 113 g active starter ½ cup
- 300 g water 1 ¼ cups water
- 480 g all-purpose flour 4 cups
Instructions
- Combine Ingredients: In a stand mixer bowl, combine all ingredients. Water (300g), starter (113g), honey(20g) (or sugar), salt (10g), and butter (56g), and then add the flour (480g) gradually to reach the right consistency.
- Knead the Dough: using the stand mixer with a dough hook, knead the dough on medium speed for about 10 minutes, until it’s stretchy, smooth, and pulls away from the sides of the bowl. The dough should be soft but hold its shape. A good test is the “windowpane test”: if you can stretch a small piece of dough until you see light through it without it tearing, it’s ready.
- Note: You can also knead the dough by hand if you don’t have a stand mixer. Knead vigorously for 10–15 minutes until you achieve a smooth, elastic dough.
- Bulk Fermentation: Once kneaded, transfer the dough to a large, lightly greased bowl. Cover it and let it rise in a warm spot for 10–12 hours. The dough should double in size during this time.
- Shape: After the bulk rise, turn the dough out onto a lightly floured surface, flatten it into a rectangle, then roll it up tightly into a log.
- Second Rise: Place the shaped dough into a parchment-lined or buttered loaf pan. Cover and let it rise at room temperature for 2–4 hours, or until doubled in size.
- Preheat and Bake: Preheat your oven to 375°F (190°C). If you’d like a shinier crust, brush the tops of your loaves with an egg wash (optional). Bake for 40-45 minutes or until the tops are golden brown and the loaves sound hollow when tapped.
- Cool and Slice: the loaves to cool completely before slicing. This cooling step is essential to finish setting the crumb structure inside the bread. Now you’re ready to enjoy fresh homemade sourdough!


